Thank you for your purchase. We're elated to be a part of your financial tracking journey. Let's get started.
Introduction to Notion
Notion is a popular productivity and organization tool that allows users to create notes, tasks, databases and much more within a single workspace. It is designed to be flexible and adaptable, so users can customize it to suit their needs. Notion can be used for a wide range of purposes, including project management, personal organization, and team collaboration.
It is available as a web app and as a mobile app for iOS and Android.
Setting up the template
After successfully purchasing the product, you will be provided with a link, directing you to the Budget Planner template in notion.
1. The initial step is to create a duplicate copy, which will then be available in your personal notion account. To do so, simply click the duplicate button on the top-right of the page.
2. After creating a duplicate copy, you may choose to stay on your browser or open the desktop app to customize the template according to your liking.
Getting Started with the Income Database
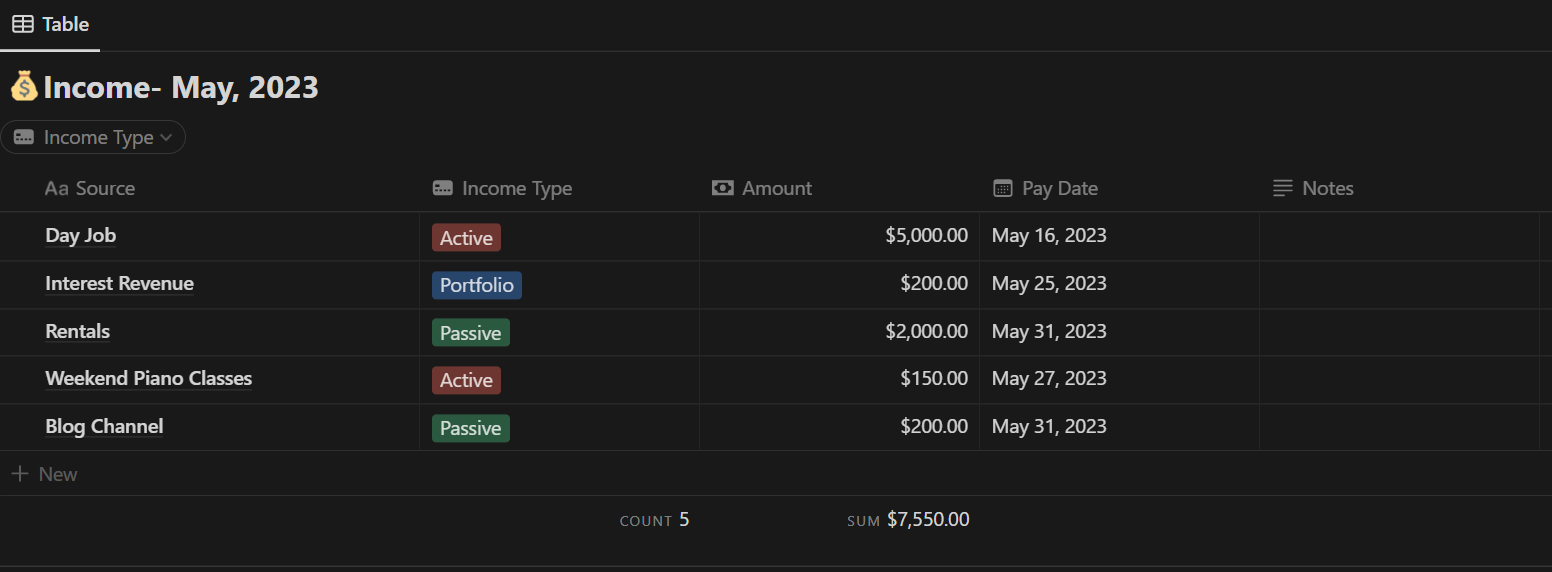
The income database categorizes different sources of income into three categories
1. Active: Active sources include salaries or wages that are earned after you've actively spent your time to get the work done. This is the most common type of income.
2. Passive: Passive sources of income includes any income that is earned by not having to actively spend time on an activity. For instance, income from a drop-shipping side hustle or from rent may qualify as passive.
3. Investments: Investment income includes any capital gains or interest received on your portfolio investments. This includes Shares and Bonds.
Simply state your source of income, categorize it in one of the three categories*, state the estimated revenue earned and include a pay date if you wish. Finally, you can also add notes beside every line item in the database.
*You may also decide to create a new category according to your liking.
The database automatically calculates the sum and the number of investments recorded.
Setting up the Expenses Database
Now let's set up the expenses database. The process is the same as described in the income section. However, expenses are categorized into 9 common types.
1. Housing
2. Entertainment
3. Groceries
4. Transportation
5. Utilities
6. Healthcare
7. Travel
8. Food & Dining
9. Miscellaneous.
You may decide to create more categories if required. The "Expense type" Button above the database easily lets you filter different expenses and calculate the totals.
Once again, state the estimated or accurate amounts of expenses incurred and mention any due dates for bills. Notion provides you with multiple options to set individual reminders and notify you when the bills are due. Type in any notes you wish to record and let the database automatically calculate the sum and counts.
Utilizing the Snapshot Feature
Our paramount Snapshot Function provides you with well..... a snapshot of your income and expenses. Using relational properties, the database pulls from the income and expenses databases to provide you their total and derive the savings value, which is represented in a progress bar format and displays if your savings target is met.
To accurately reflect the progress bar, click edit property and ensure that the derived value is divided by the targeted savings amount. For instance in the illustration below, the target savings is $3000. So 3000 is written in the divide by section.
Adding more line items in the snapshot
By default, the snapshot feature can account for the 5 Income line items and 10 expenses line items and provide you with the values. Additionally, you can easily add more lines to be reflected in the snapshot.
To do so, follow the steps below:
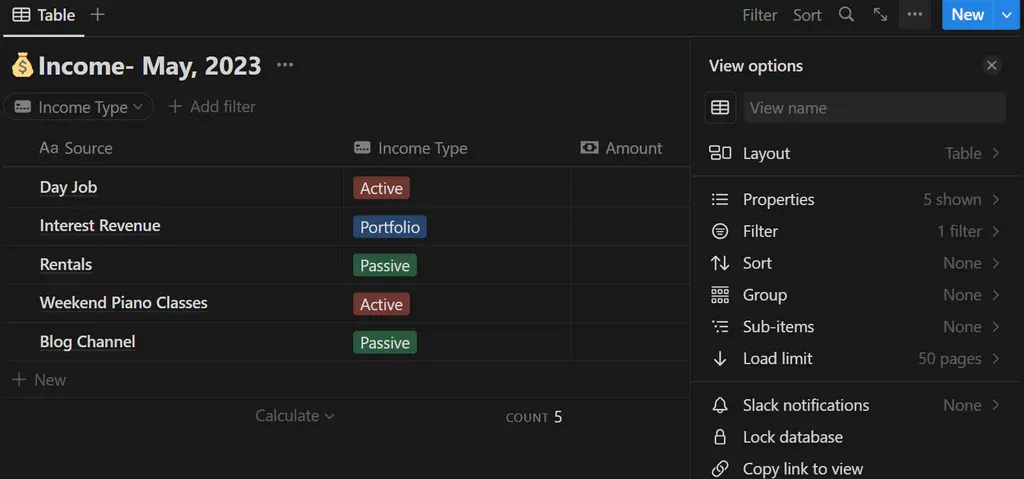
1. simply hover to the far right of the database table and click on the three dots. This pops up the view options menu.
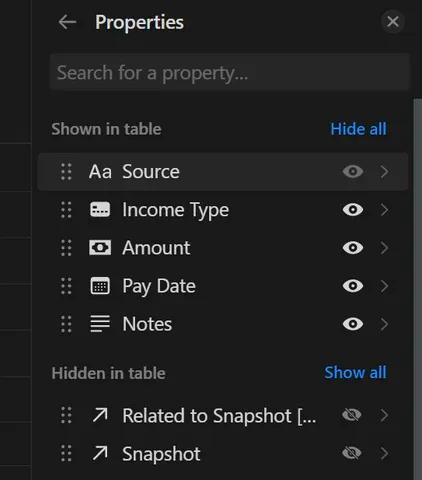
2. Click on properties, then under the hidden in table section, Unhide the "Snapshot" property by clicking on the eye icon. A new (previously hidden property will become visible).
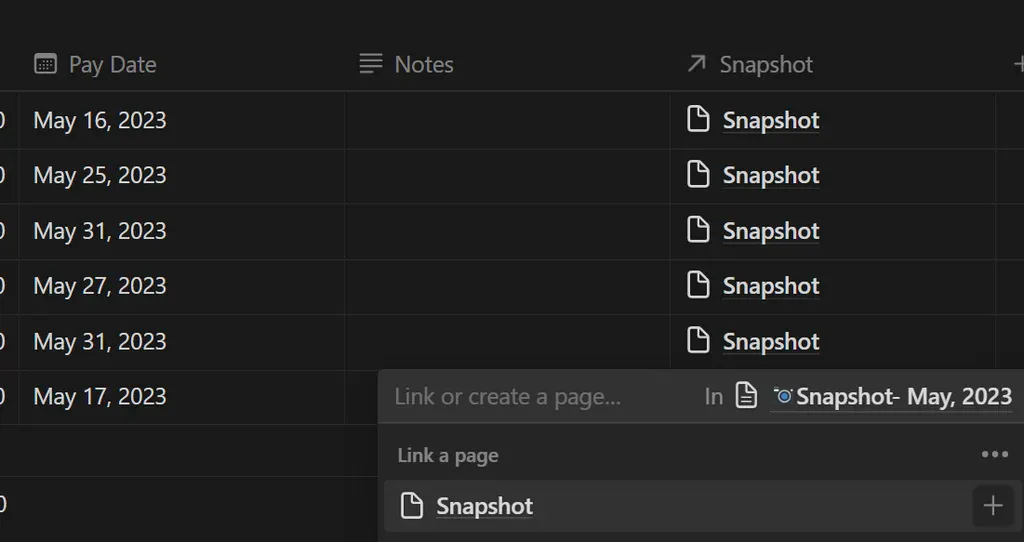
3. Now, under the Snapshot section, simply hover down to the new line item, click the empty space then select snapshot. The new line will now be included in the snapshot. The process is the same for both income and expenses databases.
4. Finally go back to the three dot menu described in step 1 & 2 and hide the "Snapshot" property again to keep the database nice and tidy. That's it. The new sum will now be reflected in your Snapshot.
Using the Archives
After the end of every budgeting cycle, you can easily create a new page under the archives and transfer the blocks into the page to retain the information for future reference.
Finally, you can easily create the whole budget with the press of a button located on the top left side.
That's it. Enjoy your Budget Planner. We hope we were able to make your every day, a little easy.
Let us know how you were able to make use of the template by following and tagging us on instagram at vitaltec.ca and be featured in our stories.